How a plug-in saved my project Review: Neat Video Denoiser Plug-in [GUEST BLOG POST]
This is a guest blog post by my friend Arne Nostitz, a Vienna-based film director and editor.
This is the story of how a little plug-In for After Effects (it’s available for other platforms as well) helped to finish my last project.
Download one of the best plugins here – Read the rest of the review here:
One of my last short films was called ‘Infinite Memory Mafia’. It was a short that was made for a competition. It was quite a quick project from start to finish because it was all done in one week – including writing the book, finding the actors & locations, the shoot & the postproduction. Sadly we didn’t win – but it was a “online-voting”-competition. So the team with the most clickfriendly facebook friends won … that’s ok. Sad, but ok.
The good thing of this whole adventure on the other hand is that now there is one more nice little shortfilm in my portfolio.
But due to the really fast editing and the limitation to 3 minutes (or something like that – i can’t remember) the film wasn’t as good as i hoped – and I knew that it had more potential. So I started (after a few months while I was busy with other work) with the – lovely sounding – Directors Cut! It was quite a bit of fun and the story got a really better drive this time.
But let’s get back to the original production first. My DP was Alex Haspel, a really great cameraman from Austria. I worked with him on a few projects already, and he knows what he is doing. Though this time we had a camera that he wasn’t used to. Plus, we got it only on the day of shooting – so there wasn’t a lot of time to get to know it in detail. It was a friend’s Canon 7D. And it was really great shooting with it. The lowlight performance looked very good on the little screen, so we were glad to shoot with natural light and some practicals. We had a lot of lights in the truck outside – but not nearly the time to shoot with all of them. So we were all happy to see that we can shoot with 3-4 simple standard 60W-100W light bulbs. After wrapping and copying all the material to my laptop (this took hours) we went to sleep, with a happy and good feeling.
On the next day, in the editing suite of a friend (my old computer wasn’t really capable of dealing with that kind of material) I imported all of the footage into Avid. Again, hours of precious time went by (oh my god i thank Avid for the 5.0 release – but this is another story, because that came a few months too late for this shoot) … just to realize that Avid rendered a really ugly noise pattern into my images. I was shocked, but as i looked at the original footage i was able to identify what happened. The lowlight performance wasn’t quite as good as it looked on the small monitor (one of a few reasons why I will never ever shoot without a proper preview monitor again). There was a really ugly noise in the pictures – and the conversion to avid .mxf wasn’t the best cure for this. Sadly, I dont have images from that, but here are a few pics of the original footage.

Back then it was not so bad. I edited in Avid and finished it in After Effects. This was good enough for the competition. And it ended up on the video platform in 360p – so the noise wasn’t the problem. Later though – the directors cut will hopefully be screened at a few festivals, or at least one cinema screen – the noise was really annoying. I tried my best with the tools After Effects offered me. The built-in Noise Reducer was ok, but it was unable to eliminate those stripes of noise in the blacks. Then I just crushed the noise in colour correction, but it got really dark – and nearly all of the details were gone. As a consequence I was really down and put the project to rest. It was really hard, but true – I completely lost interest in completing the short film, because i didn’t like the look it had.
So there it was, stuck on one of those HDDs on my shelf. And it waited. Until a few days ago. I remembered the short and got a bad feeling, because all the people who worked so hard on this film were still waiting for the final product. The actors who worked for me for free – all they wanted was good footage for their reel. One of them got all the footage from me, but the others just wanted the final for some snippets. So i put the HDD back into my QuickPort and fired up After Effects (check out Nino’s blog post on storing DSLR footage and the QuickPort solution right here). (The director’s cut was edited on a MacBook Pro 13″, in Avid 5.0 and After Effects CS5) With all the raw footage ingested into this new configuration I searched the web for a good solution for my problem.
And voila! there it was: Neat Video Pro.
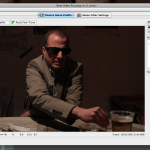
I downloaded the demo hoping for a good solution. The demo videos looked good and promising, but what will happen to these ugly stripes of noise? I tried it. The demo is quite restricted, because it just denoises a very small portion of your image. But it gives you a preview – and this was amazing. The edges and details stayed in the picture, but the noise was gone – after only pulling a rectangle around and the press two buttons.
Here is a video with some details of the Noise Reducing: Noise Video Sample … Sadly the Compression eats a lot up – but in the detail view you’ll see a difference!
I instantly bought the software. Its $99 for the unlimited HD version (there is one for SD for $49) – so it’s a steal! I installed it and started the project. I applied the effect to a problematic shot, rectangle, analyze -> click, finetune -> click … and all the noise was gone. I stared at the screen with my mouth open. The images even looked sharper than before. So copy & paste the effect to all of the clips – that took about 10 minutes, and the film was sharp as a knife – no more noise. Only in the really problematic shots there is a little rest, but not to mention. You can barely see the stripes anymore.
The effect is really simple to use. You search for a spot in your picture where you can draw a rectangle over a unified area (a wall without structure, the floor, …) and then the little program starts its magic. Neat Video then analyses the noise pattern and BOOM – it’s gone. I don’t know what kind of badass programmers or voodoo have done it, but it works like a charm – so thumbs up!
Only downside of the plugin is that it adds a bit to the rendertime – but hey… it saved me a whole project … so these few minutes more (ok … it were hours) – who cares.
After this triumph I even pushed an old video from 2000 through the plugin. this project was shot on a Canon XM1, edited on Discreet Edit (after transfer to Beta SP – only way to get in), post production in Discreet Combustion, rendered with really bad codec, because uncompressed was to big for the system – and output to .avi and Intel Indeo 5… the most ****** up codec out there I guess. But after floating through time and space – AND NEAT VIDEO PRO … it looked really, really better. I still can’t believe it.
So please have a look at the demo. It’s really for all kind of cameras. It just doesn´t matter. You can even save the noise pattern settings for future use on your next project that was shot on the same camera.
Have fun with it … now I’m not afraid of the dark anymore – if you know what I mean ![]()
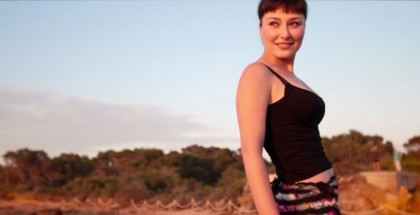
Here are some pics of the final short film:
This was a guest blog post by my friend Arne Nostitz, a Vienna-based film director and editor.
-
Thanks for this stunning blog, once more!
These plugins help to fix human’s or machine’s errors, but should not become the “gold standard”, hopefully …
Check the Magic Bullet Denoiser by Red Giant Software, too:
http://www.redgiantsoftware.com/products/all/magic-bullet-denoiser/
There is a big debate in the net on which one performs better. Maybe you have the chance to compare the Neat against the Magic Bullet Denoiser?

![How a plug-in saved my project Review: Neat Video Denoiser Plug-in [GUEST BLOG POST]](http://ninofilm.net/blog/wp-content/uploads/2010/12/4_Final-600x337.jpg)






Comments